
BATIK METHOD OF FABRIC DESIGN STEP BY STEP
Batik is an Indonesian word, derived from the word "tik", meaning "a little bit" or " a drop". This refers to the tiny drops of hot melted wax used on the design to resist the dye. The tradition is held to have originated in java, the most populated Island indonesia.
The batik process is another popular dye resist technique in which the design is applied to the material with a substance that will resist the action of the dye. This substance is commonly wax. Wax is applied to the cloth with a traditional tool known as a "tjanting" or brush and the cloth is then dipped or brushed with dye.
Batik design is one of the ways of decorating fabrics.
This method is the process of using candle wax to prevent dye from penetrating into the fabric. So candle wax could be use to draw design on fabric to retain the colour while other part absorb the dye.

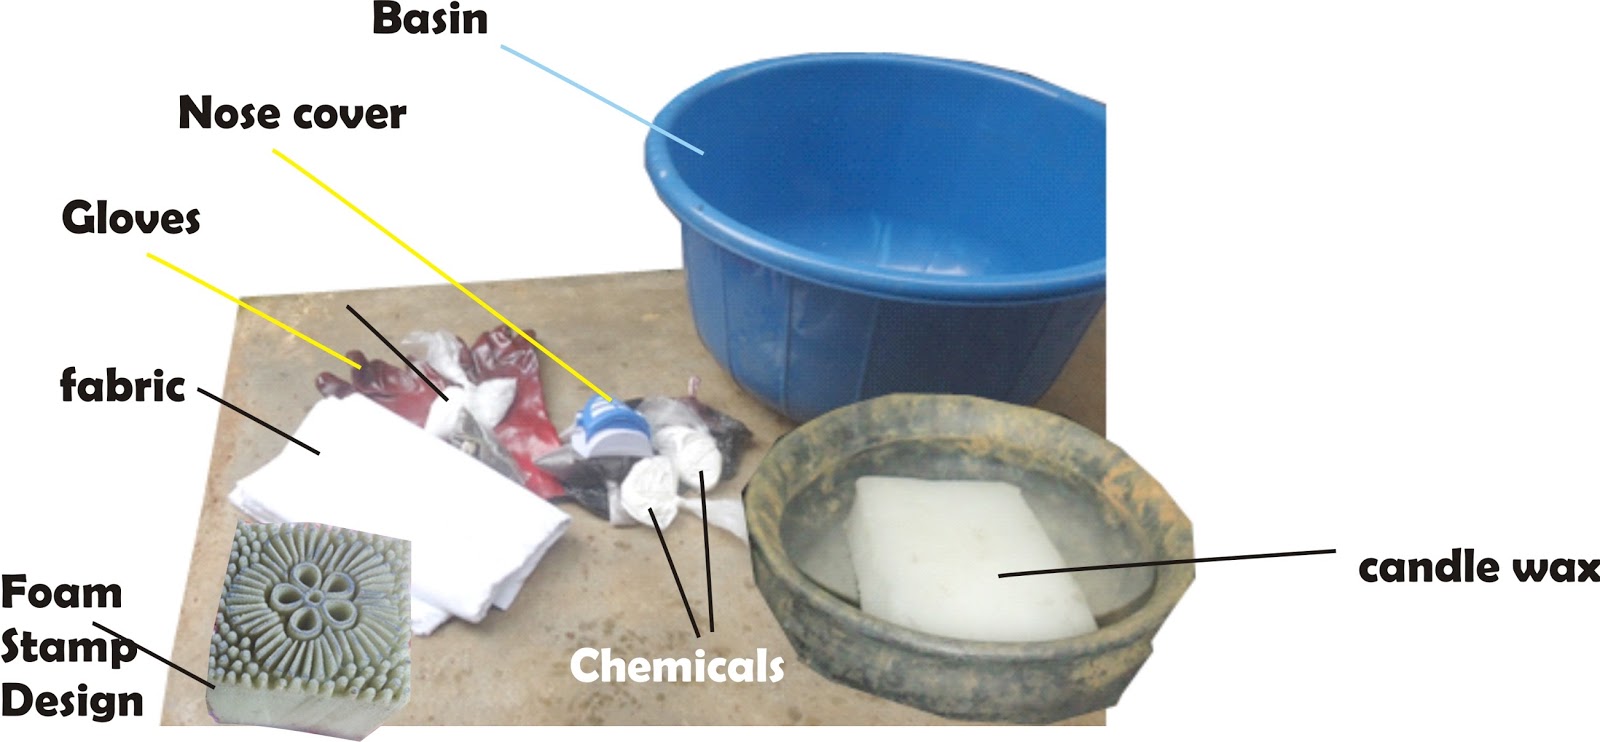
⚫ Before you start you need to get materials ready:
MATERIALS NEEDED:
1. Fabric 100% cotton (either white or any bright colour).
2. Chemicals (Hydrosulphite and Caustic Soda)
3. Dye stuff (dark colours like royal blue,olive green,black e.t.c).
4. Candle wax
5. Frying pan
6. Stick
7. Rubber Gloves
8. Nose cover
9. Cooker (stove or gas cooker or firewood,coal.)
10. Stamp either wooden stamp or foam stamp design.
11. basin.
12. Big metal pot or bucket.


ii. Spread the white fabric on top of the smooth surface.
iii. Get your stove,frying pan and candle wax ready. Light the stove and put the candle wax into the frying pan.

iv. Allow the candle wax to melt. You can cut bit by bit for quick result.

vii. Then deep your design foam into the candle wax.

viii. Shake two times to avoid too much of wax that can cause the design to look smear. But by shaking you get an even stamping.
ix. Stamp like three steps faster, then return back into the melted candle wax and repeat step viii till you are done with the whole fabric.

Note: Ensure that fabric are raised up immediately after stamping. So that the fabric will not stick to the plank wood.
Also: Make sure you shake the foam design to remove wax remains from foam. so that it will be useful another time. If not the design will break easily. Then keep it face up not facing down.


START NOW
MATERIALS NEEDED:
1. Fabric 100% cotton (either white or any bright colour).
2. Chemicals (Hydrosulphite and Caustic Soda)
3. Dye stuff (dark colours like royal blue,olive green,black e.t.c).
4. Candle wax
5. Frying pan
6. Stick
7. Rubber Gloves
8. Nose cover
9. Cooker (stove or gas cooker or firewood,coal.)
10. Stamp either wooden stamp or foam stamp design.
11. basin.
12. Big metal pot or bucket.
STEP ONE: STAMPING FABRIC WITH CANDLE WAX
⚫ Stamping process is the step in which design are stamped with candle wax on fabric.
i. Get a flat plank (plywood) or a flat metal sheet, that will fit for the wideness of the fabric.
ii. Spread the white fabric on top of the smooth surface.
iii. Get your stove,frying pan and candle wax ready. Light the stove and put the candle wax into the frying pan.

iv. Allow the candle wax to melt. You can cut bit by bit for quick result.
v. The candle wax must not be too hot nor too cold. To get even result while stamping. Also you either get something to put the melted candle when it's too hot or you lower your stove.
vi. Next you spread you fabric on the wood plank.
vii. Then deep your design foam into the candle wax.

viii. Shake two times to avoid too much of wax that can cause the design to look smear. But by shaking you get an even stamping.
ix. Stamp like three steps faster, then return back into the melted candle wax and repeat step viii till you are done with the whole fabric.

Note: Ensure that fabric are raised up immediately after stamping. So that the fabric will not stick to the plank wood.
Also: Make sure you shake the foam design to remove wax remains from foam. so that it will be useful another time. If not the design will break easily. Then keep it face up not facing down.

STEP TWO: DYEING PROCESS IN BATIK
⚫ Dyeing process is the next stage after stamping.
i. Prepare your chemical and dye solution with cold water or hot water and leave to cool like lukewarm.
ii. Fold the fabric into four fold. Then insert into dye bath section by section very quickly to enable even circulation.


iii. Dye by using rotation method and by turning from one side to the other at intervals.
iv. After all that leave to soak for 10 minutes.
v. Remove from dye bath and leave to oxidize for like 15 minutes.
vi. Spread it on the floor in four fold. Then pour cool water on it by flooding one side four times and turn to the other side and flood four times.
vi. Spread it on the floor in four fold. Then pour cool water on it by flooding one side four times and turn to the other side and flood four times.
Note: Do not squeeze to prevent candle wax from cracking.
STEP THREE: DEWAXING PROCESS
⚫ Dewaxing is the process of removing the candle wax stamped to the fabric, after dyeing. The candle wax will enable the fabric retain its color.
i. First you need to boil water, much enough to cover the whole fabric. (It must be very hot). Then get a cold water beside it in the basin.
ii. Insert the fabric into the hot water and use stick press it into the hot water well. So that the candle will melt. Immediately insert it into cold water. or Get two buckets one empty the other filled with cool water. Then put the fabric into the empty one. pour hot water into it. Then immediately remove and insert into cold water. You will see the candle wax removing.
iii. For complete removal of candle wax. two people should hold it at each end and dust it several times to remove the leftover candle wax.


